Zapier Notifications
Zapier is a web-based automation tool that enables users to connect various web applications together and automate repetitive tasks between them. It acts as a bridge between different apps and allows them to communicate and exchange information seamlessly. xConnect has the ability to integrate with the Zapier platform and send updates to the platform to be handled as you please. xConnect supports the ability to send Zapier notifications for custom events and outage events. Zapier notifications are disabled for new events by default. You can read more about Zapier and how it works on their website.
Enabling Zapier notifications
- Login as a power user
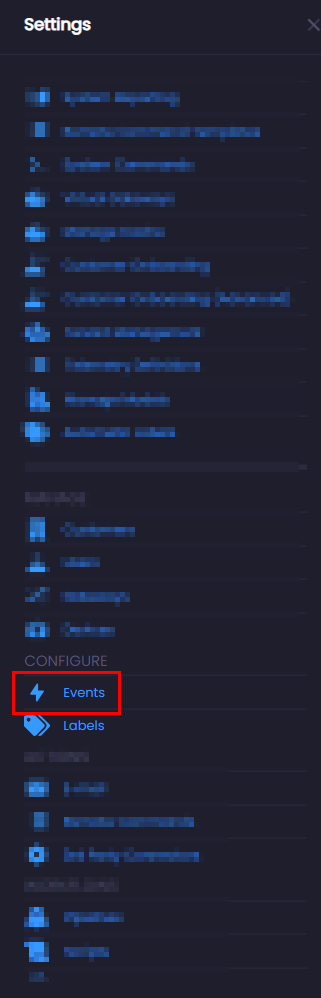
- Click the settings icon on the header menu

- Click on the "Events" menu item in the "Configure" section
- Click on "Custom Configurations" tab to access custom event configurations.
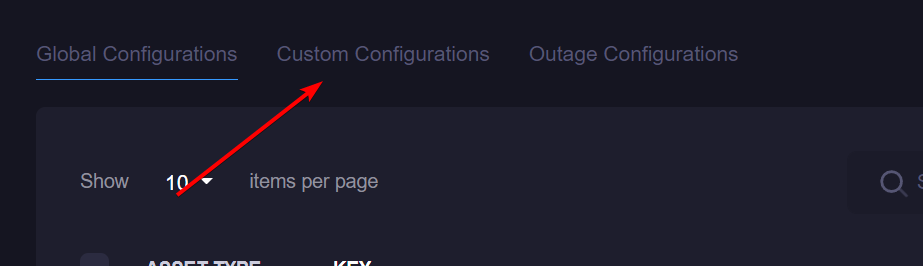
- Alternatively click on the "Outage Configurations" tab to access outage event configurations.

- Click the Zapier icon to enable or disable Zapier notifications for a particular event configuration.
![]() Zapier notifications are disabled for this event.
Zapier notifications are disabled for this event.
![]() Zapier notifications are enabled for this event.
Zapier notifications are enabled for this event.
Creating a Zap
With Zapier notifications enabled for some events, you can now create "Zaps" to handle incoming data from those events. xConnect will notify Zapier whenever a Zapier enabled event has occurred. From the Zapier platform, you can choose how to handle this event. One example would be to send an SMS message to your cell phone when a particular event occurs.
Use the following steps to create a Zap from the Zapier platform.
- Open your browser to Zapier.com and click the Login button. You will need to create an account if you do not have one.
- At the dashboard, click the "Create Zap" button to create a new Zap. The wizard will help to guide you through the process.

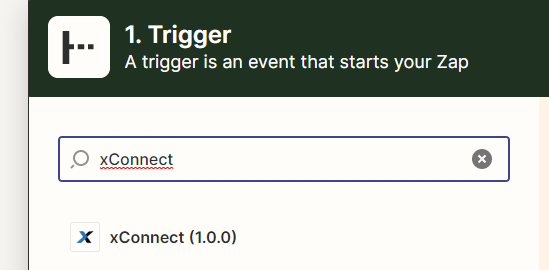
- From the Search box in the Trigger setup page, search for the application you want to use. In this case, search for "xConnect".
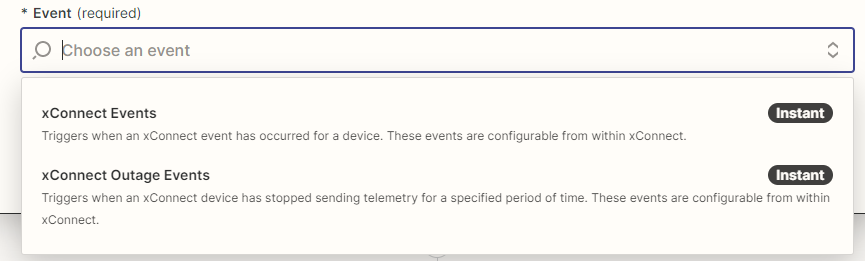
- Choose the appropriate event that you wish to receive notifications for and click Continue. xConnect supports Events and Outage Events.
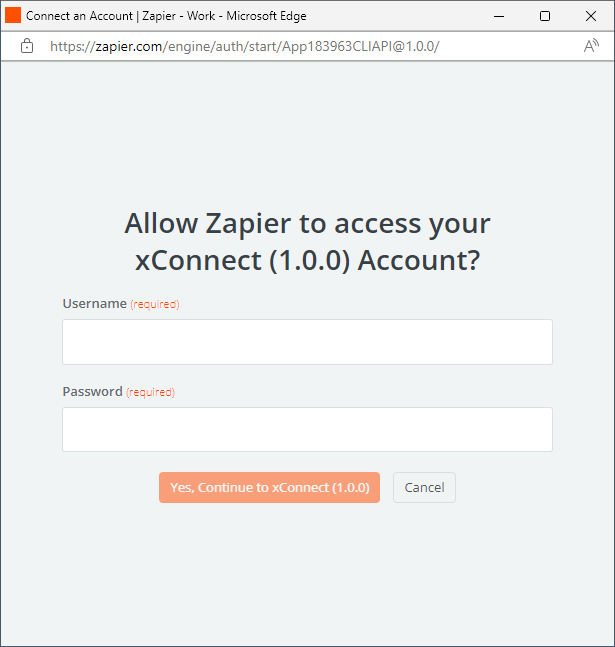
- You need to authenticate with Zapier by clicking the "Sign In" button. After you have done this once, your credentials will be saved to be used in other Zaps.

- A new window will open asking for your xConnect credentials.
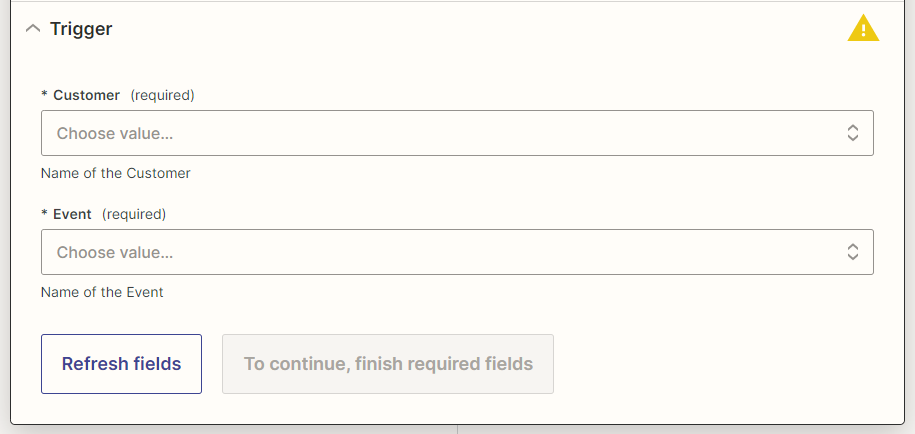
- At the Trigger setup step, you will need to choose the Customer and Event that you want to receive updates for.
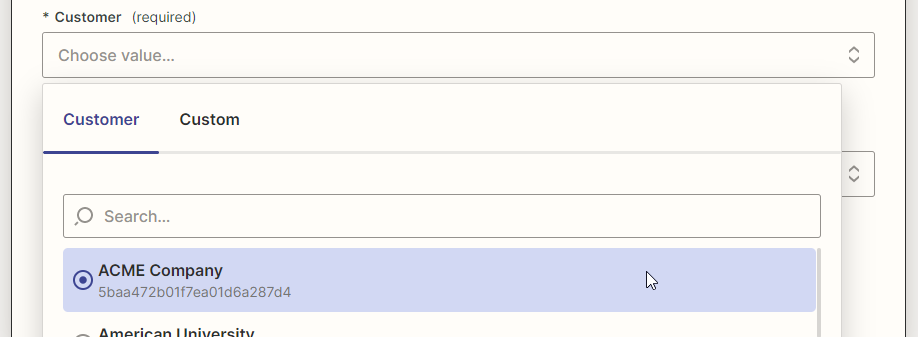
- Choose the customer from the Customer dropdown. This will populate the Event dropdown with Zapier enabled events for that customer.
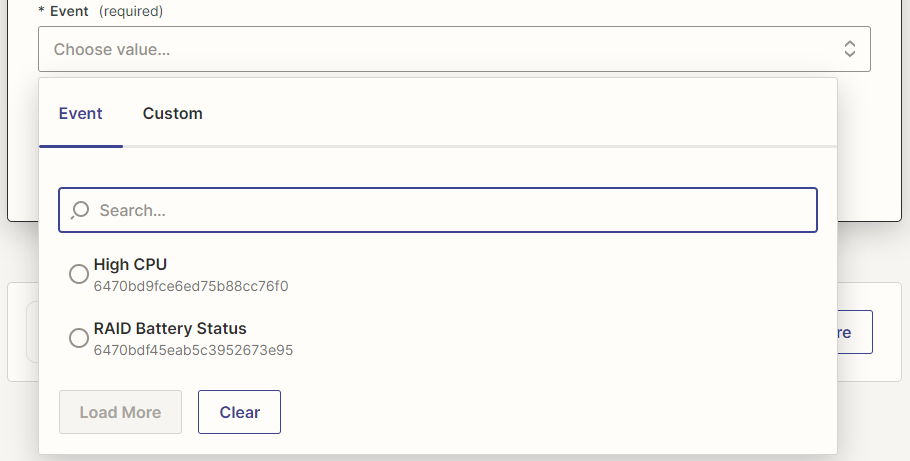
- Choose the event from the Event dropdown and click the Continue button.
- Testing your Trigger is checking that xConnect and Zapier are properly communicating. This step will also get a sample set of data for you to preview.

- Click the "Test Trigger" button to perform the test and preview the data.
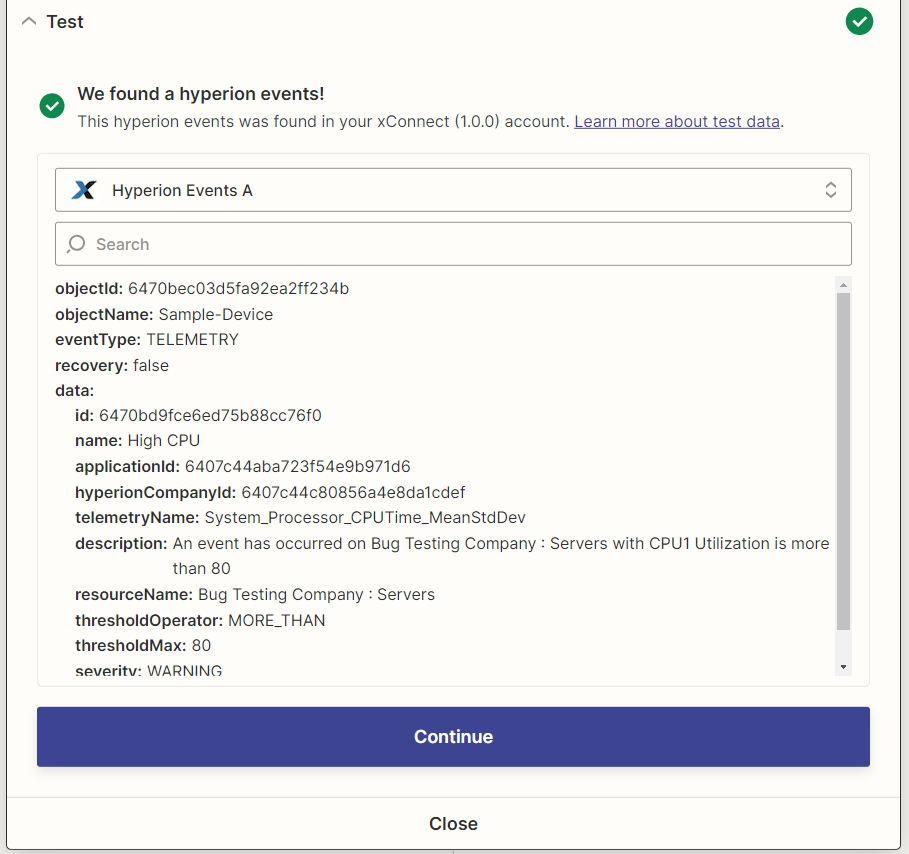
- Click the Continue button to finalize the first step in setting up your Zap.
- The first part of setting up your Zap is complete. xConnect will now send updates to Zapier for the configured event.
After you've completed the previous steps, it is ultimately up to you on what you decide to do with the data. From here, you can continue on to create an Action or several that can perform various tasks from writing in an Excel spreadsheet to sending an email or SMS message. The process varies depending on the application you plan to use, however, Zapier provides an intuitive wizard to help guide you through the process.
As a sample action you can send an email when an event occurs. From the Action step, search for "email" and choose
"Email by Zapier". This will use the Zapier platform to send an email. Walk through the wizard to setup sending an email.
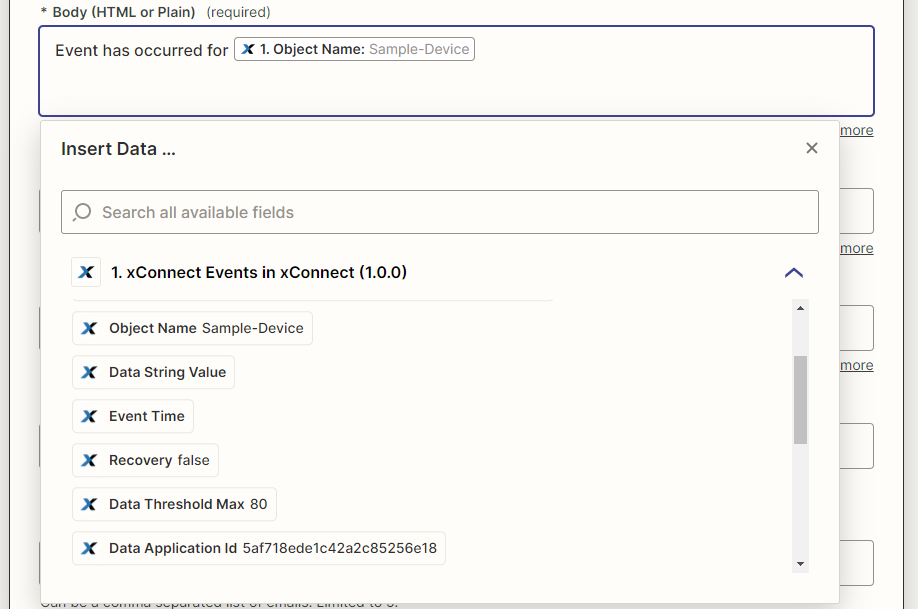
In the body of the email you can choose to embed data from the Zapier notification. For example, the xConnect device name,
or the event name. Zapier provides a preview of the sample data that you can choose from. Here you can see the dropdown
contains all the values from the sample data.
With your Zap finally setup, you can now enable or disable it from the main Zapier dashboard.

Data Format
xConnect has a standard structure for the data that is sent to Zapier. In every Zapier update, xConnect will send several standard fields. Additionally, xConnect will send data pertaining to that specific update. This section will provide a description of the data and some sample data.
Standard Fields
These are fields in every update xConnect sends to Zapier.
| Field | Description | Sample |
|---|---|---|
| objectId | The unique id of the device the event occurred on | 641097374e02133460449c4e |
| objectName | The name of the device the event occurred on | LabServer01 |
| eventType | The type of event that has occurred. Possible values are: TELEMETRY and OUTAGE | TELEMETRY |
| recovery | A flag indicating if this is a recovery event | true |
| data | The event data that has occurred in xConnect | See next sections |
Event Fields
These are fields specifically in the event updates.
| Field | Description | Sample |
|---|---|---|
| id | The unique id of the event | 64229f72d81c4548de3d4160 |
| name | The name of the event | High CPU |
| applicationId | The unique id of the application for this event | 6421a7057796f83e1ec050a7 |
| hyperionCompanyId | The unique id of the customer for this event | 6407c44c80856a4e8da1cdef |
| telemetryName | The telemetry key used for this event | System_Processor_CPUTime_MeanStdDev |
| description | A description of the event | An event has occurred on ACME Company : Servers with CPU1 Utilization is more than 80 |
| resourceName | A name for the resources for this event | ACME Company : Servers |
| thresholdOperator | The operator used for this event. Possible values are: EQUALS, NOT_EQUALS, MORE_THAN, LESS_THAN, RANGE, IN_RANGE | MORE_THAN |
| thresholdMin | The minimum value for this event. May be empty. | 25 |
| thresholdMax | The maximum value for this event. May be empty. | 80 |
| stringValue | The telemetry value for this event. | 75 |
| severity | The severity of this event. Possible values are: INFORMATIONAL, WARNING, ERROR, CRITICAL, OFFLINE | INFORMATIONAL |
| eventType | The type of event that has occurred. Possible value are: TELEMETRY, OUTAGE | TELEMETRY |
Outage Event Fields
These are fields specifically in the outage event updates.
| Field | Description | Sample |
|---|---|---|
| description | The description of the outage event | Server |
| criteria | The criteria for this outage event | No Telemetry (60) |
| noTelemetry | A flag indicating if this was an outage or not | true |
| noTelemetryTime | The time (in minutes) that telemetry has not been received | 60 |
| expiration | The expiration time (in minutes) that the event will expire. Once expired, the event will occur again. | 600 |
| enabled | A flag indicating this event is enabled or not | true |
| parameters | A set of data that was used for this event. May be empty. |