Manage Pipelines
Pipelines are workflows that execute one or more scripts that are defined by a power user. The workflows leverage the scheduling engine to execute on a daily, monthly, or hourly basis. See the scheduling documentation for more information.
Note
As of May, 2023 release, Manage Pipelines is an experimental feature and may contain bugs. Report any issues found to support@senecaxconnect.com
Accessing Pipelines
1. Log in as a power user
2. Ensure experimental features is enabled for your account:

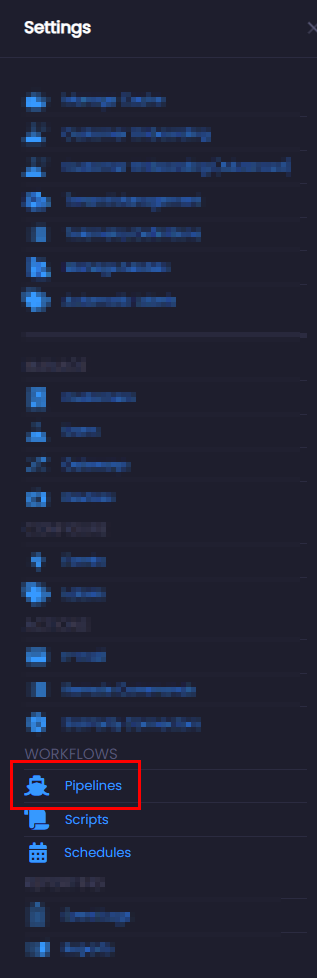
3. Click on the "Pipelines" menu item in the "Workflows" section
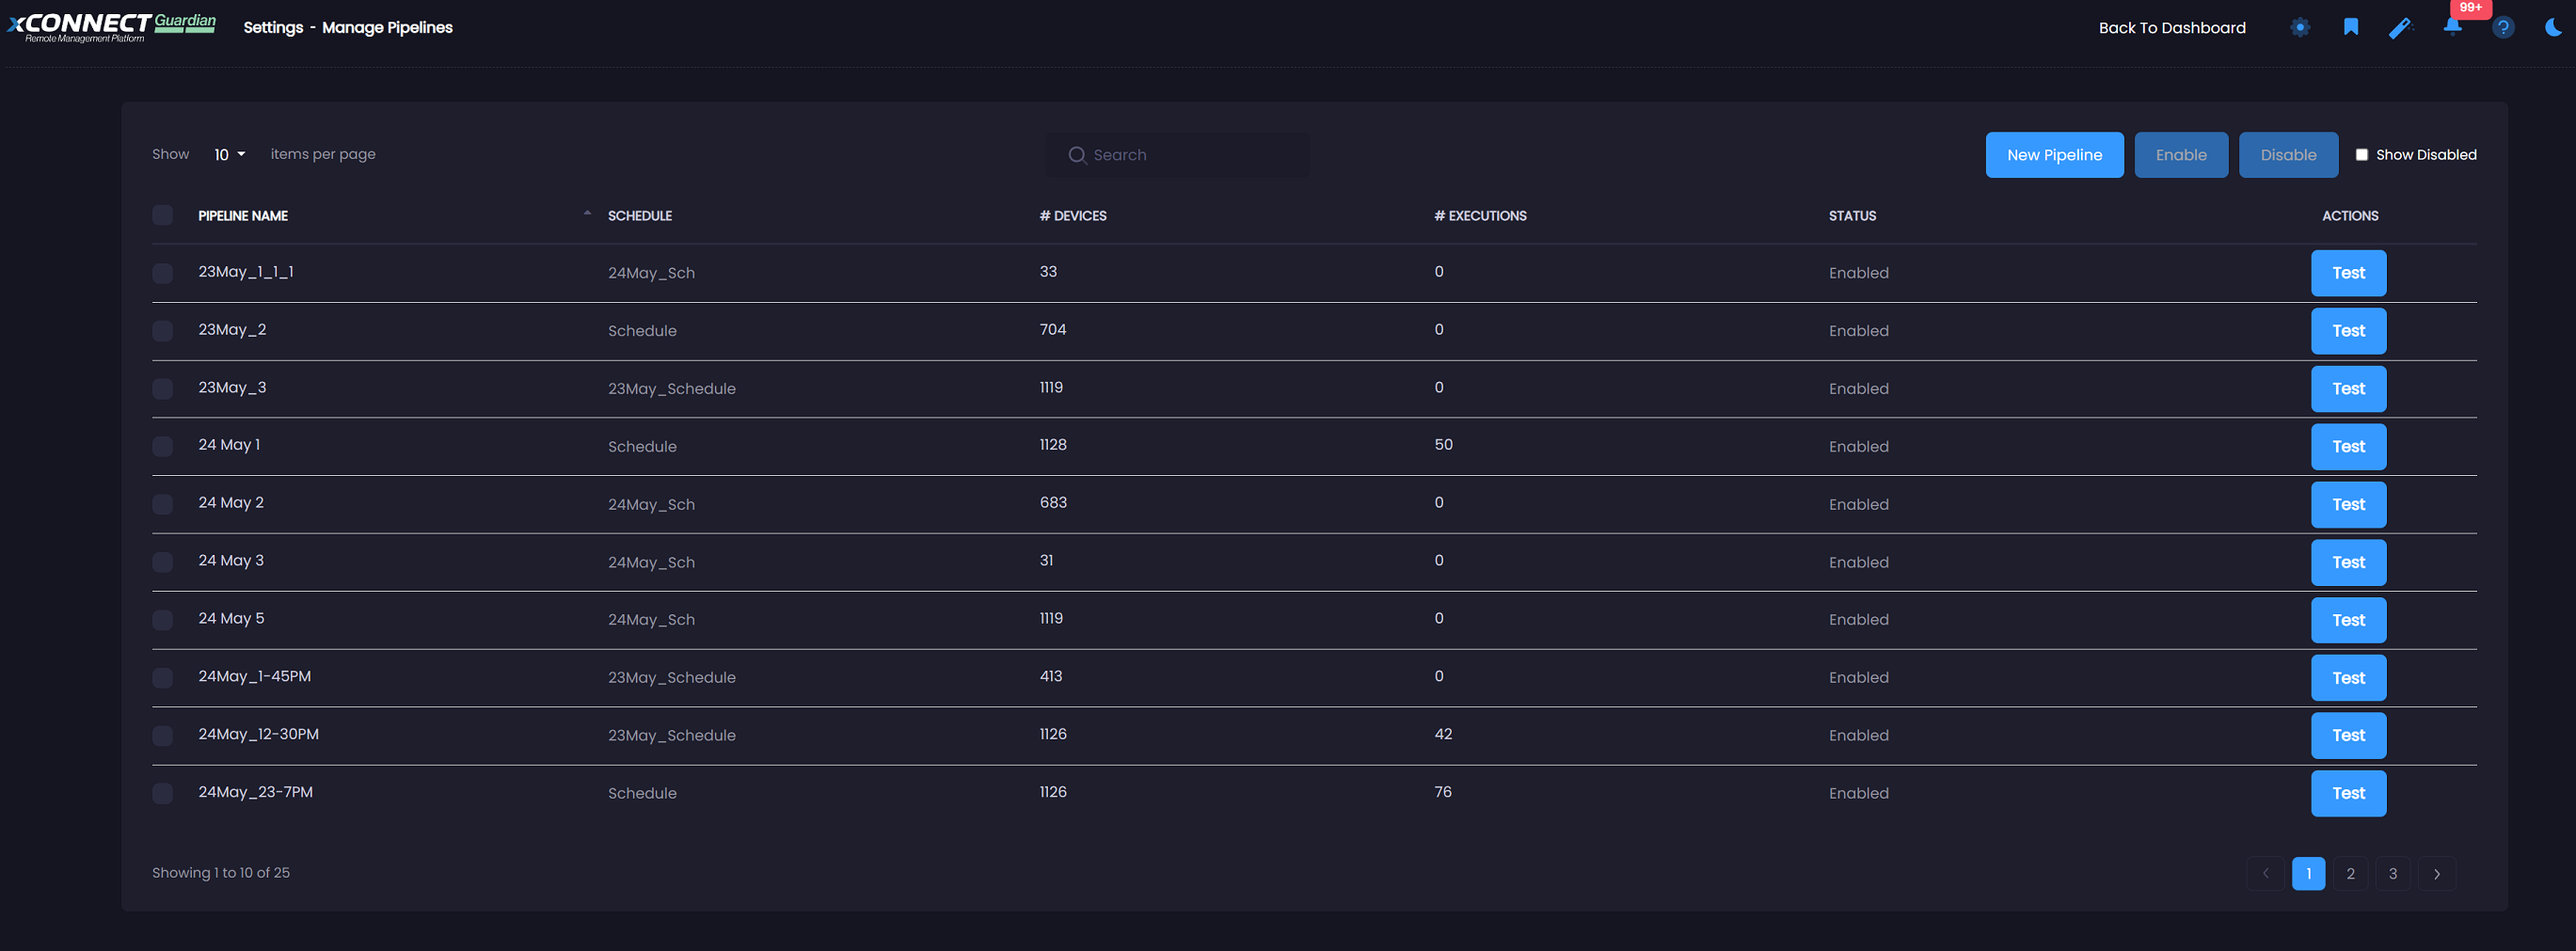
Upon navigating to the manage pipelines page, you will see a list of all of your active pipelines.
Creating/Updating Using the Pipeline editor
In order to edit or create a new pipeline, you must leverage the pipeline editor tool. This is a friendly click-and-drag UI that enables users to easily define their workflows.
To access the pipeline editor, either click on an existing pipeline or click on "New Pipeline" when on the pipeline management page.
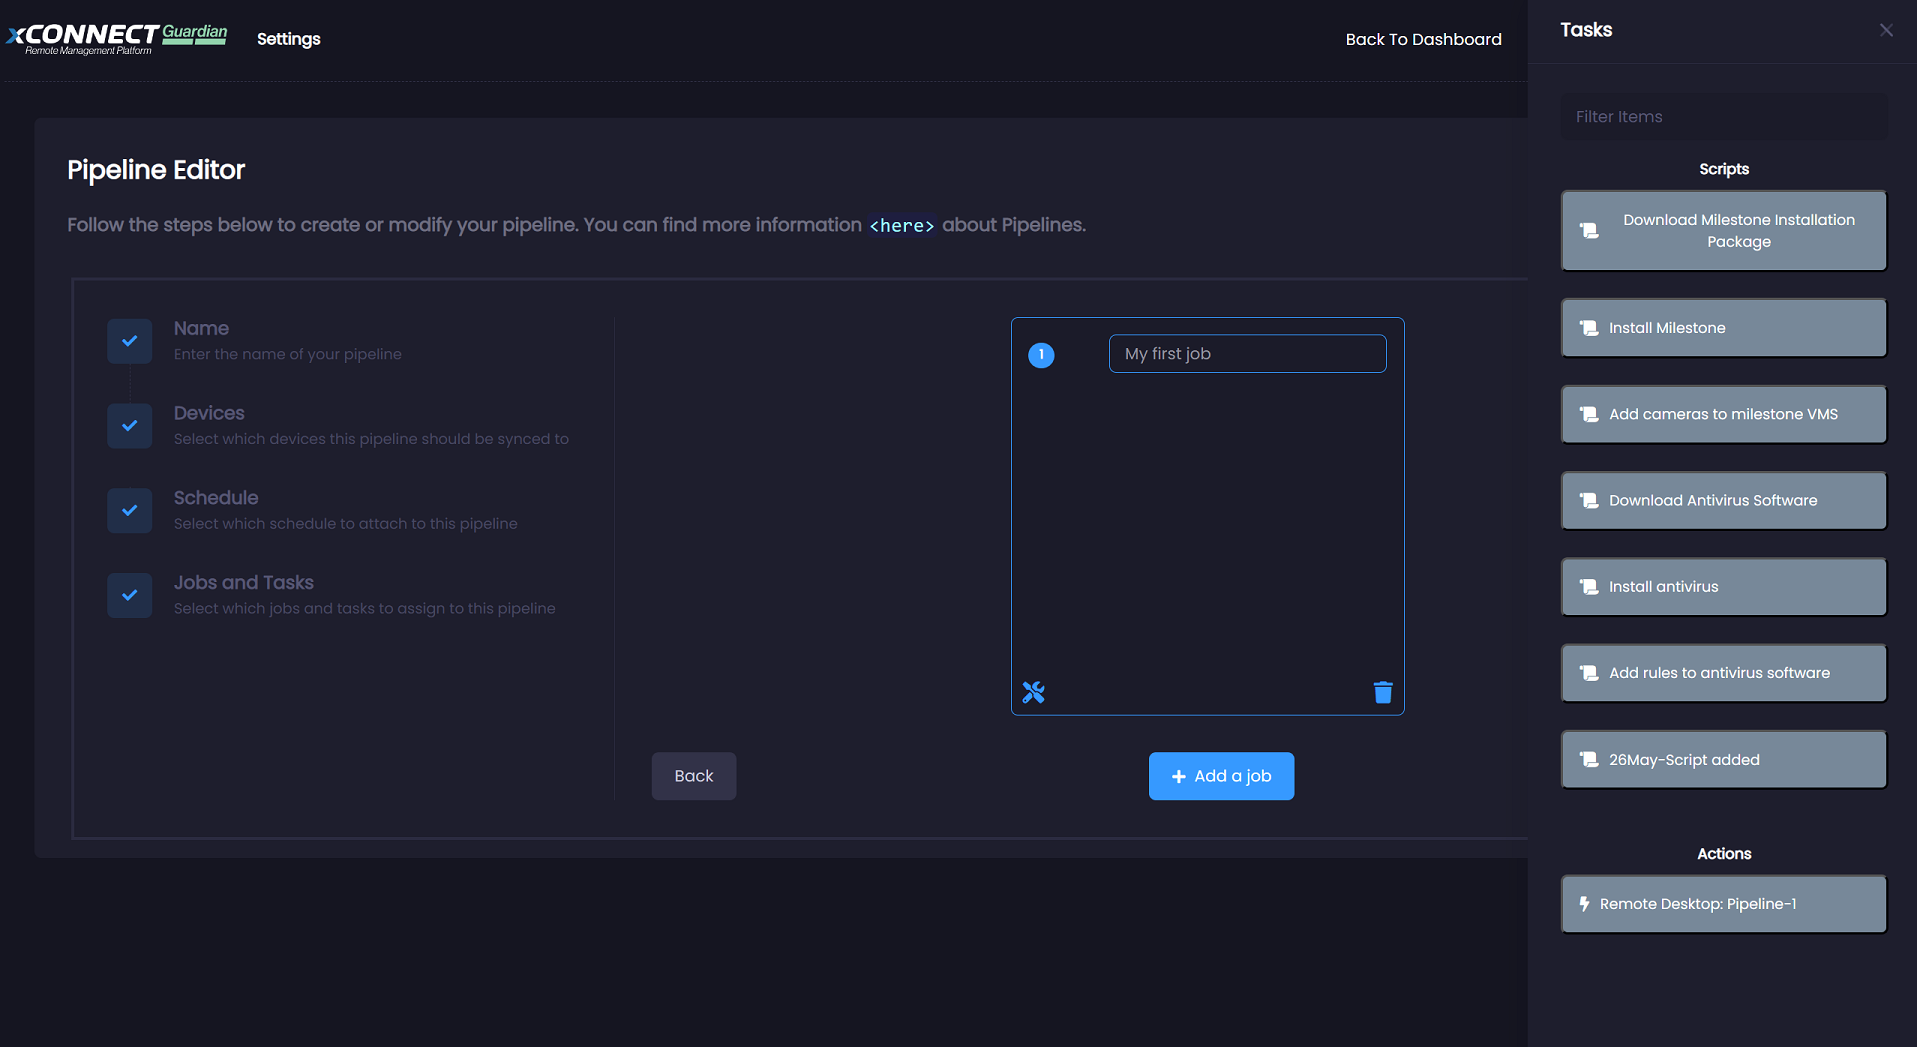
Once the editor is open, you will see a 4-step wizard that will allow you to change or define your pipeline.
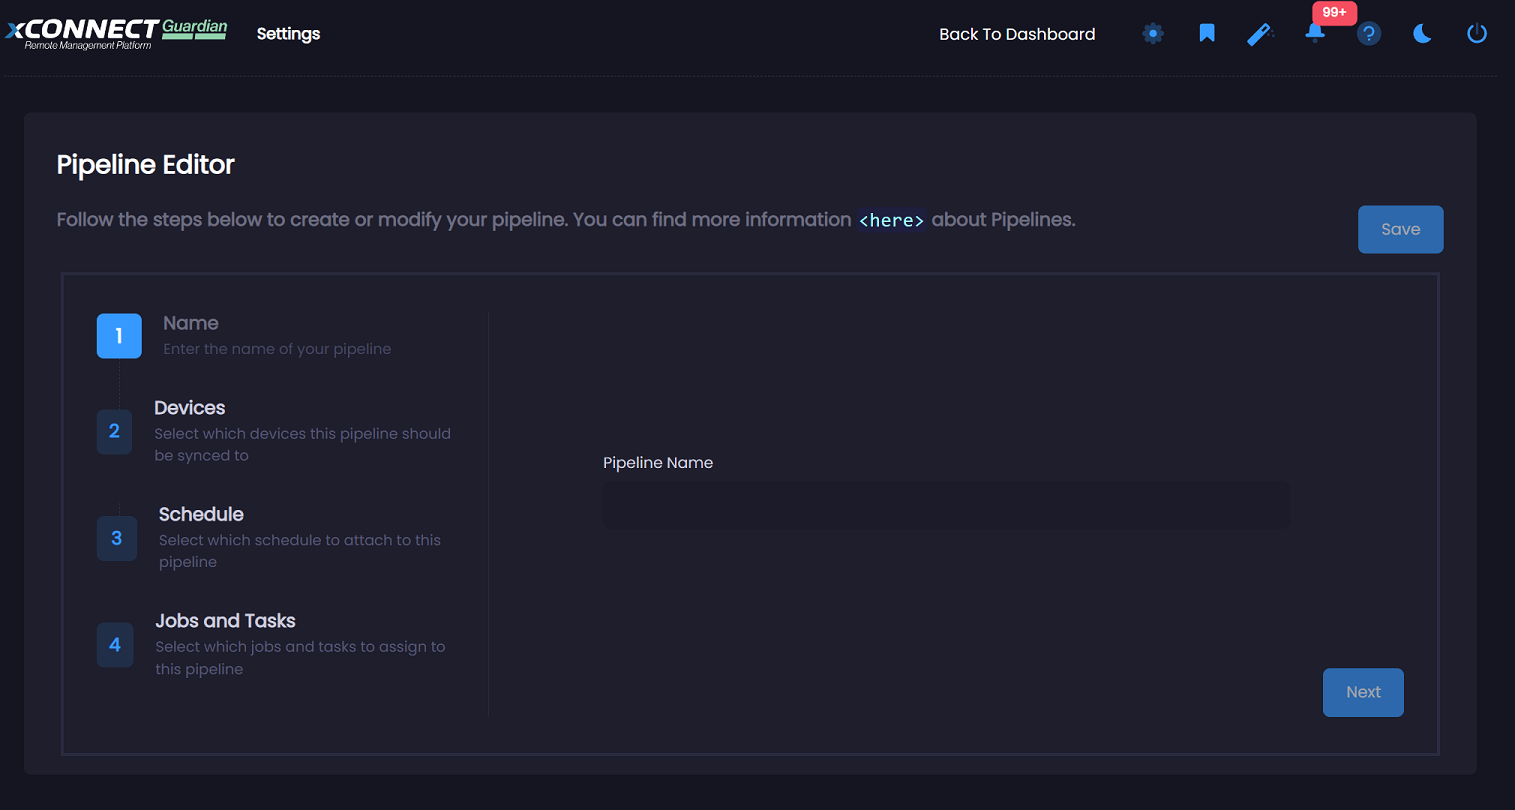
1. Enter the desired name of your pipeline. This will allow you to easily find your pipeline. Once finished, click next.
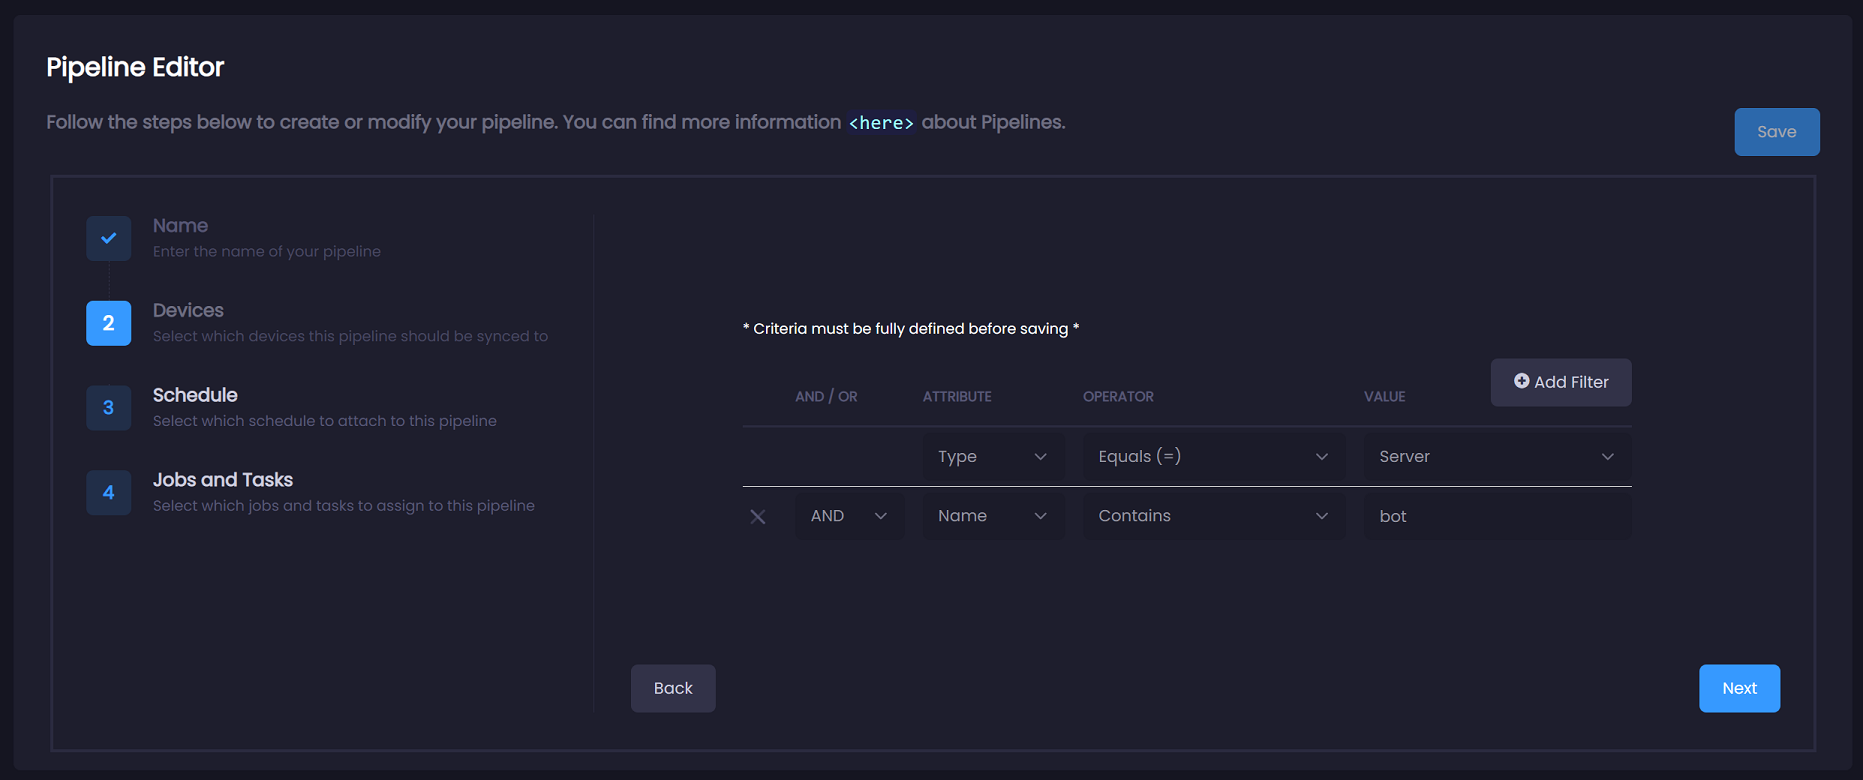
2. Upon hitting next, you will be taken to Step 2, which will allow you to define what devices this pipeline should apply to. This is a very important step. Pipelines are managed on the agent, which means that the agent is responsible for executing this workflow based on a particular schedule. Only the appropriate agents should be receiving the pipeline request.
3. Once you have correctly defined your device criteria, click next. Step 3 will determine when the pipeline is executed. As of 2023.05.1, we are currently supporting one-time, daily and weekly recurring times. Monthly will be available as part of a future release. You can either select an existing schedule, or you can create a new one. Once selected, the next button will be enabled.
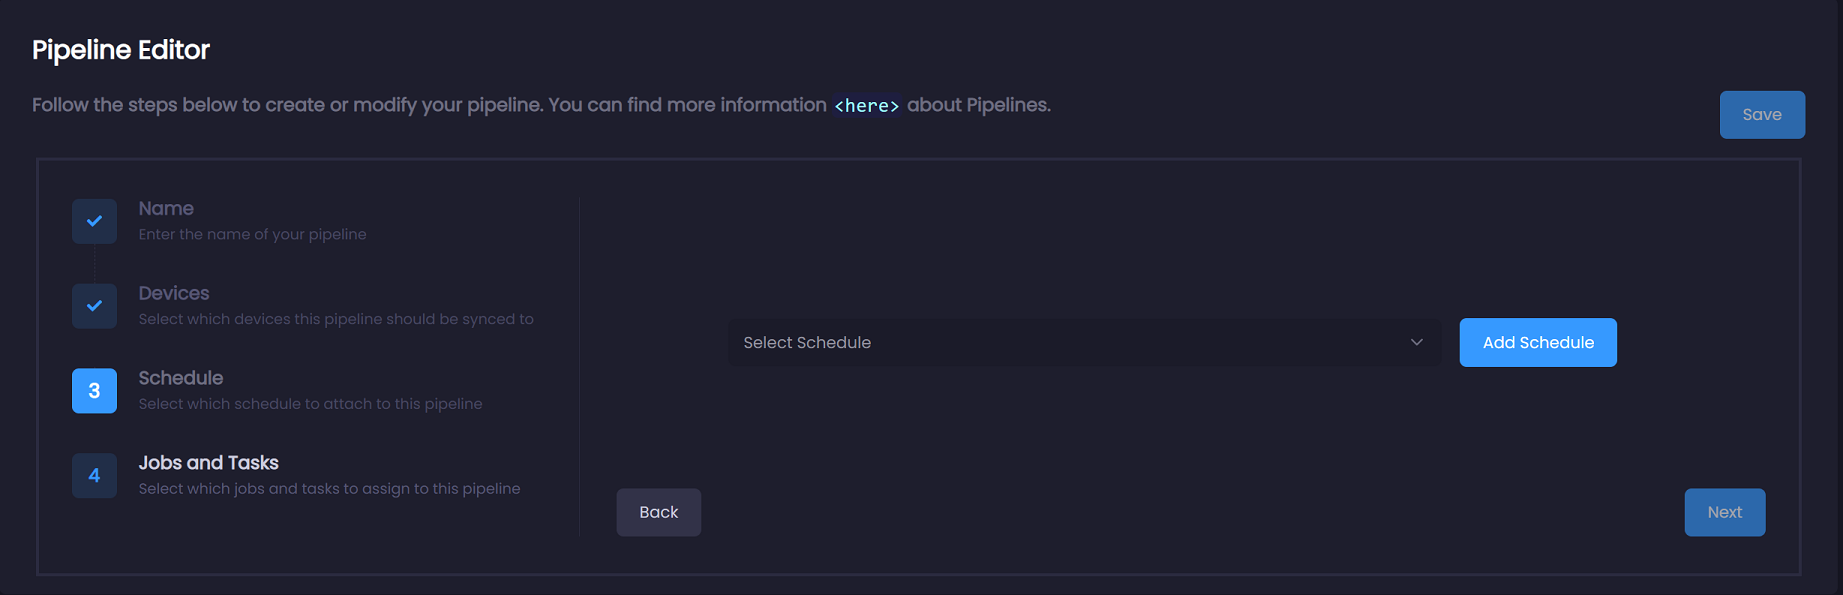
For more information on creating schedules, please see Manage Schedules
4. Click next. You will be taken to the final step "Jobs & Tasks", which will feature your jobs and tasks:
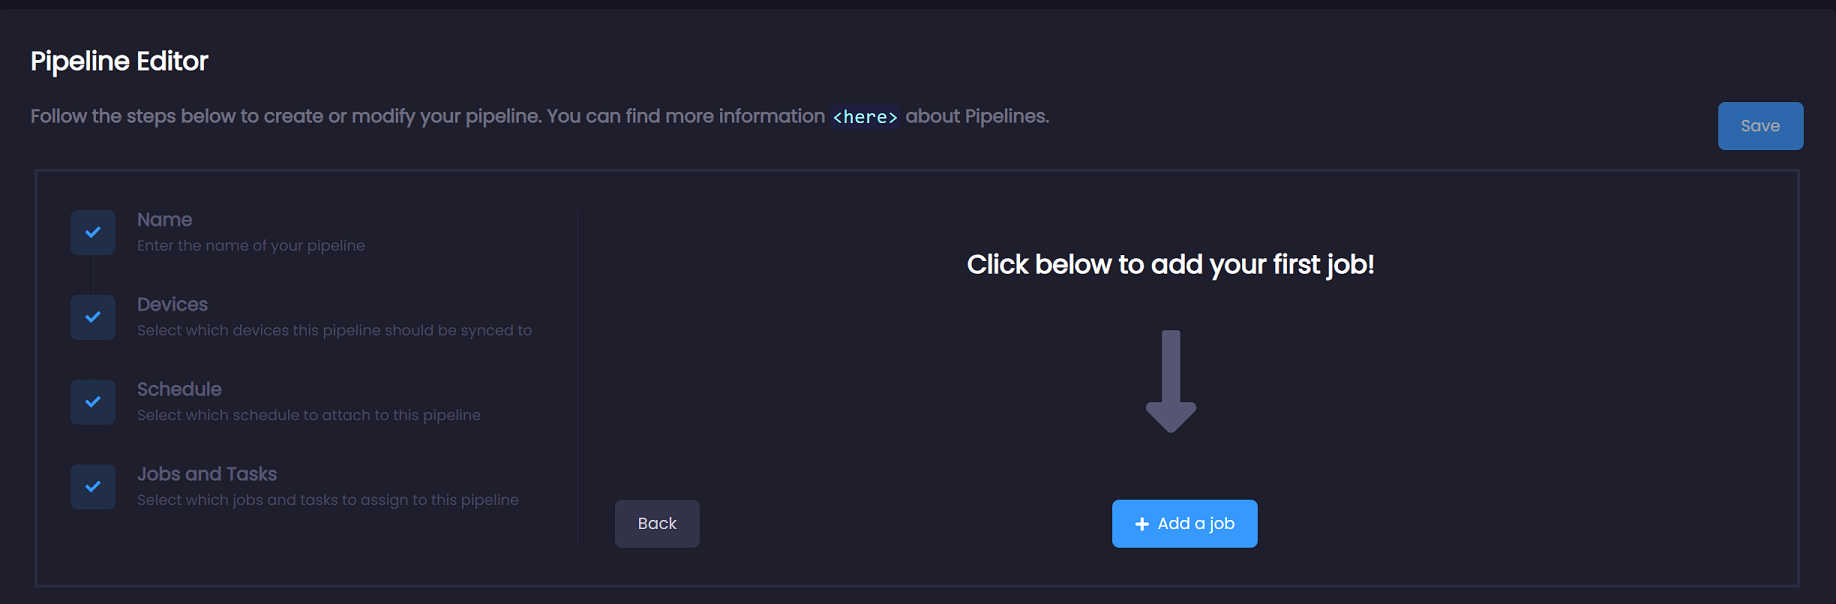
Click on the "Add a job" button, this will add a new job to the workflow.
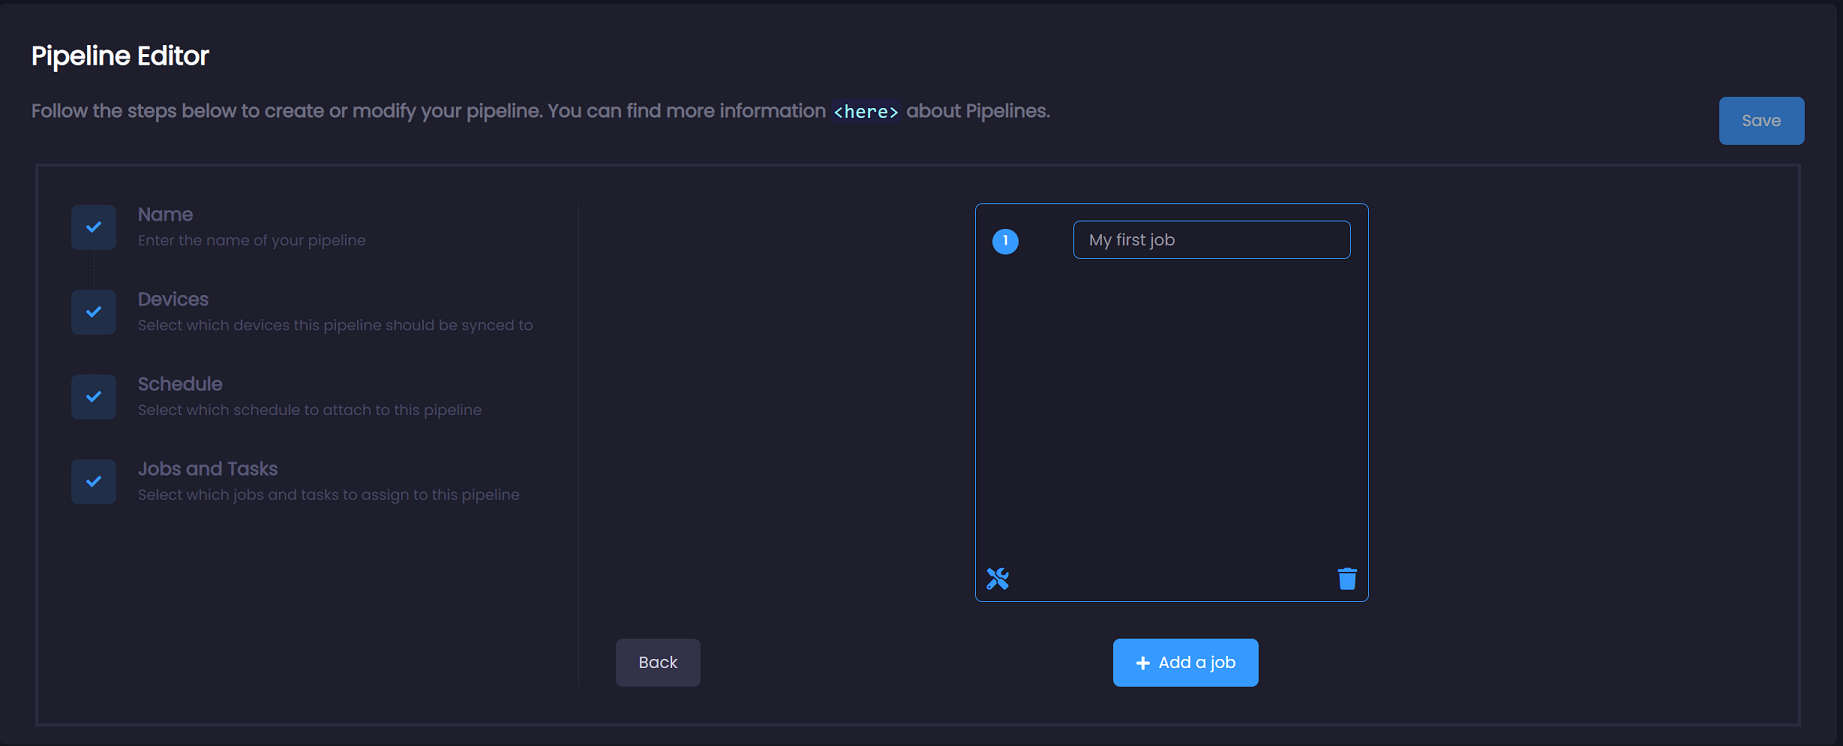
Clicking on the tool icon ![]() will open your toolbar that features all scripts and system actions that are currently available:
will open your toolbar that features all scripts and system actions that are currently available:
5. Once the toolbar is open, you can left-click on any object listed, and drag it to the desired job. In the example below, I have 4 tasks within my first job, which will run in the numbered order that's displayed:
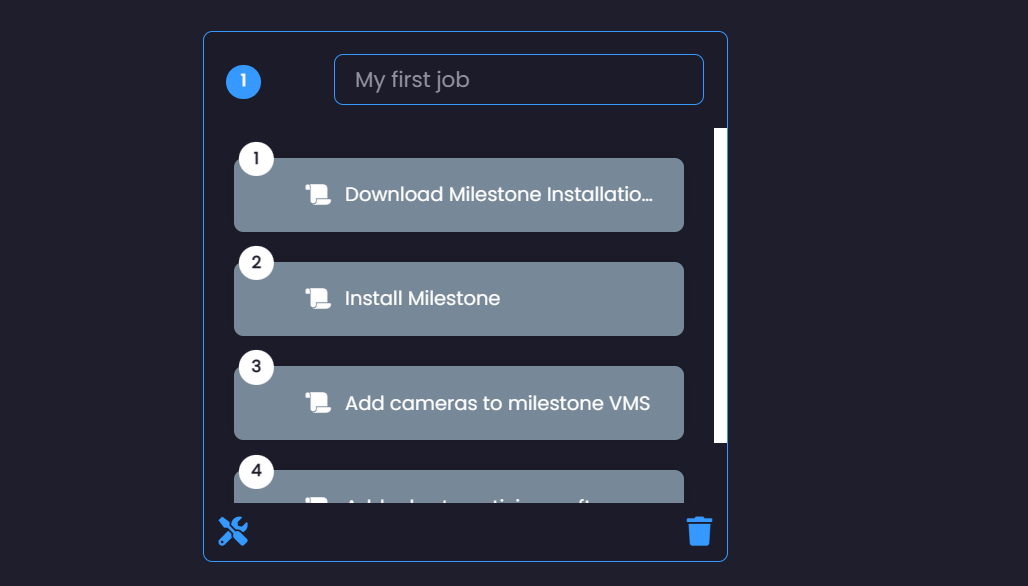
Each of these tasks will be run in a linear order, so in this case, it will first download Milestone installer, then install it, and add cameras to the VMS once its installed.
Once you are finished editing your pipeline, click on the Save button. The pipeline will be created and sent to the agent for handling.
Disabling a pipeline
You can disable an existing pipeline by leveraging the manage pipelines grid, and selecting one or more rows then click "Disable":
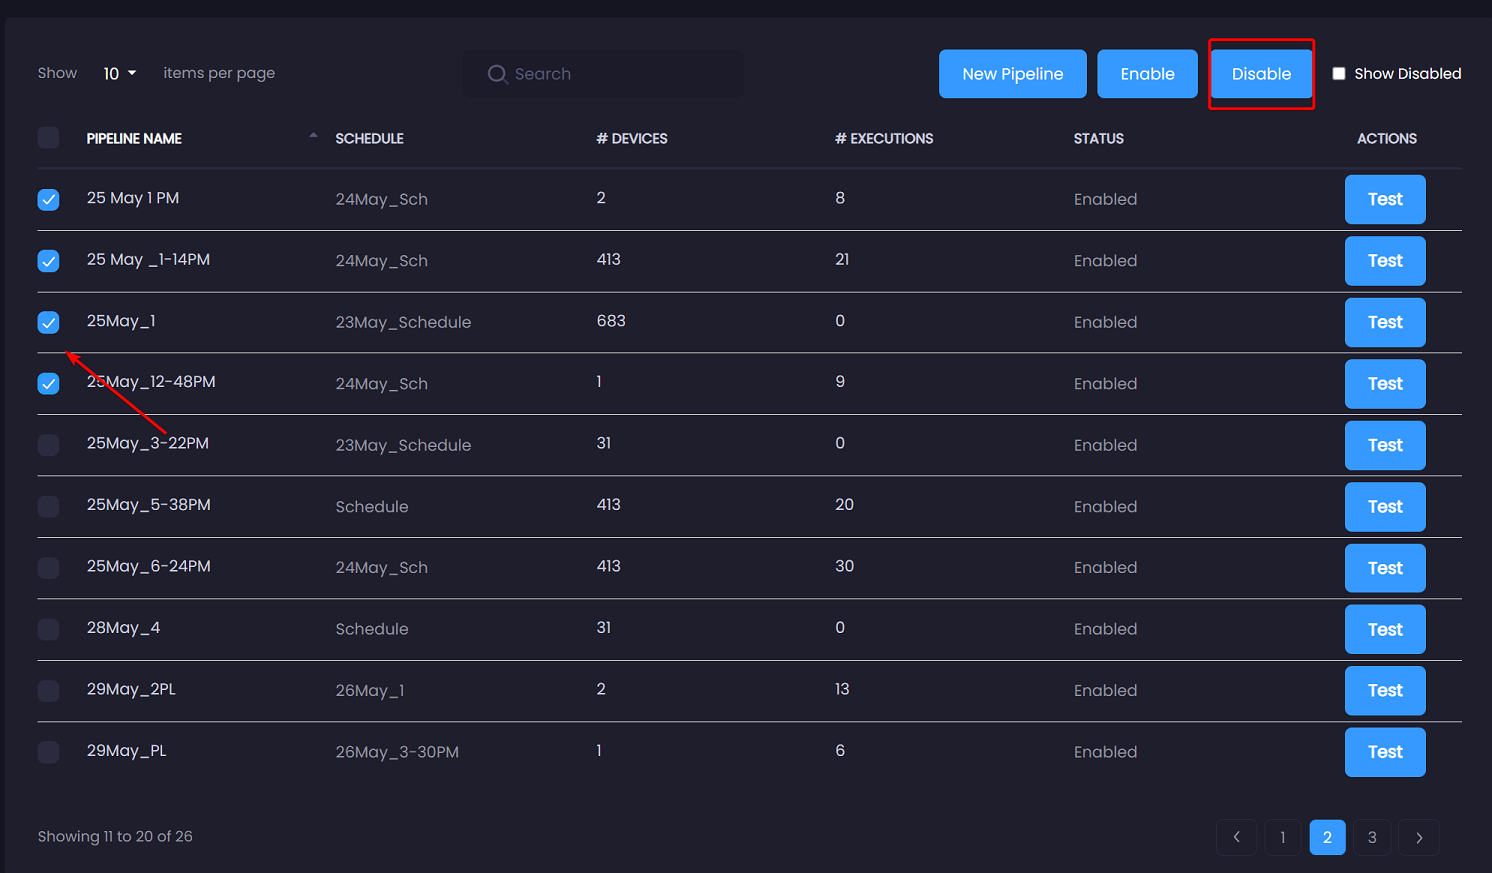
Once a pipeline is disabled, the agent will no longer execute its workflow.
Testing a pipeline
After setting up your pipeline, you can test it by clicking on the "Test" button via the manage pipelines grid:
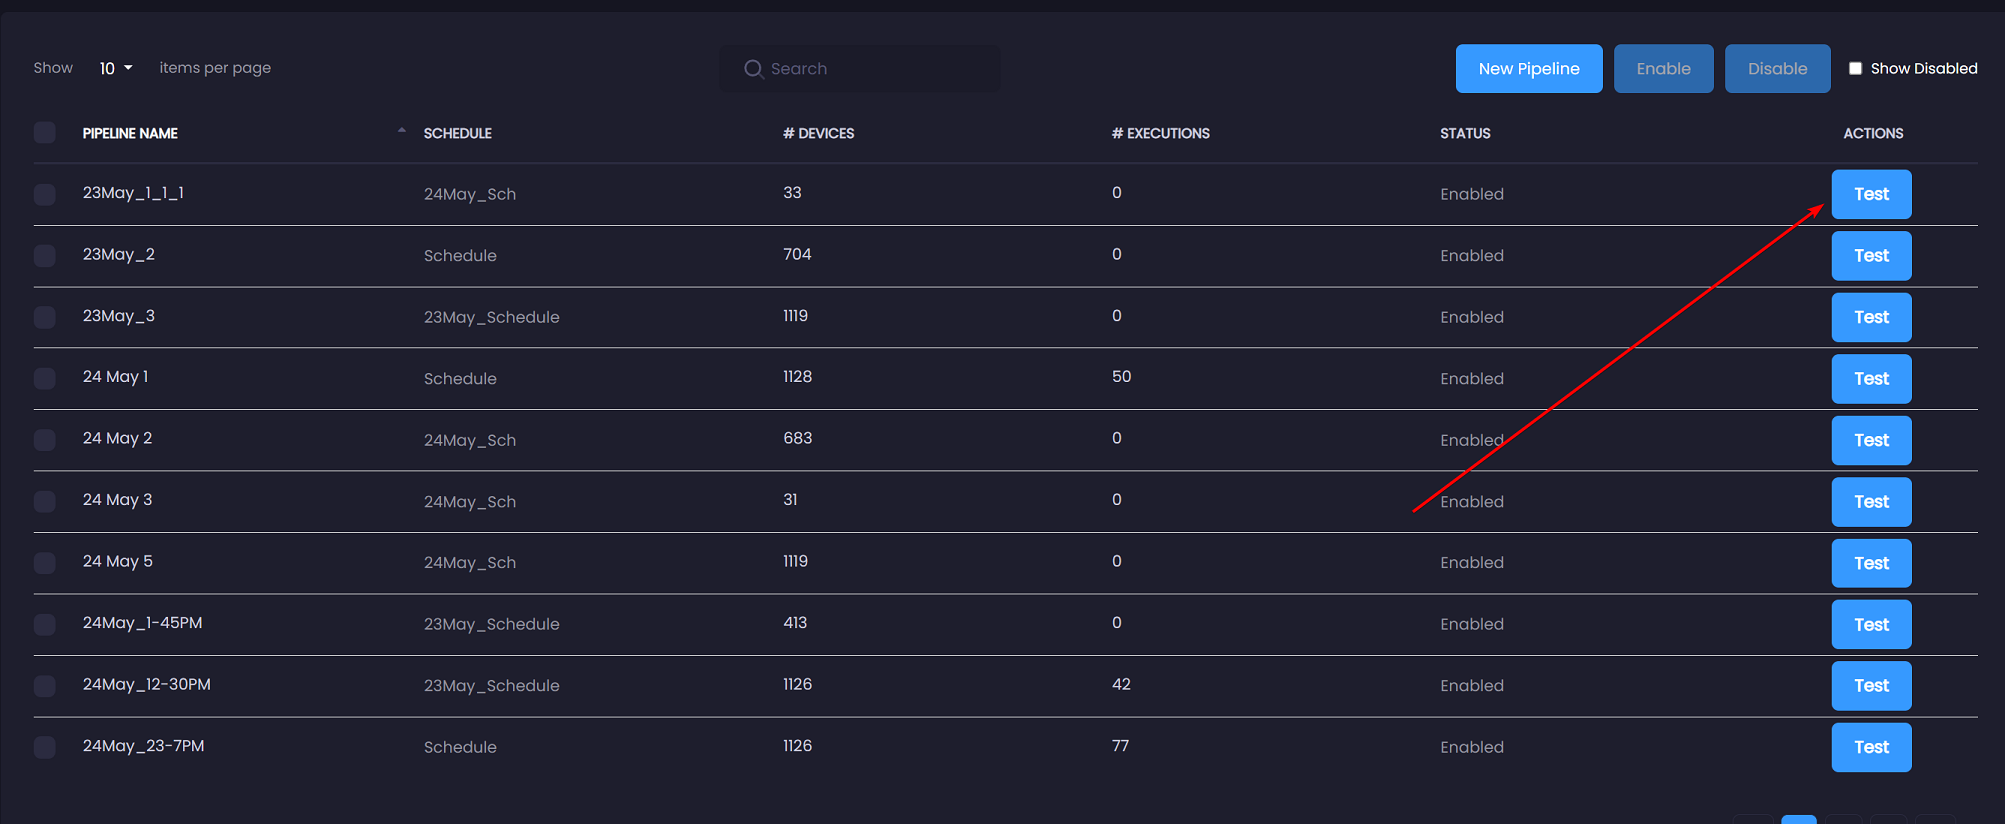
Testing a pipeline will immediately execute the pipeline on the selected agent. Upon clicking the "Test" button, a modal will appear that features a select dropdown (or auto-complete text search if you have over 50 devices)
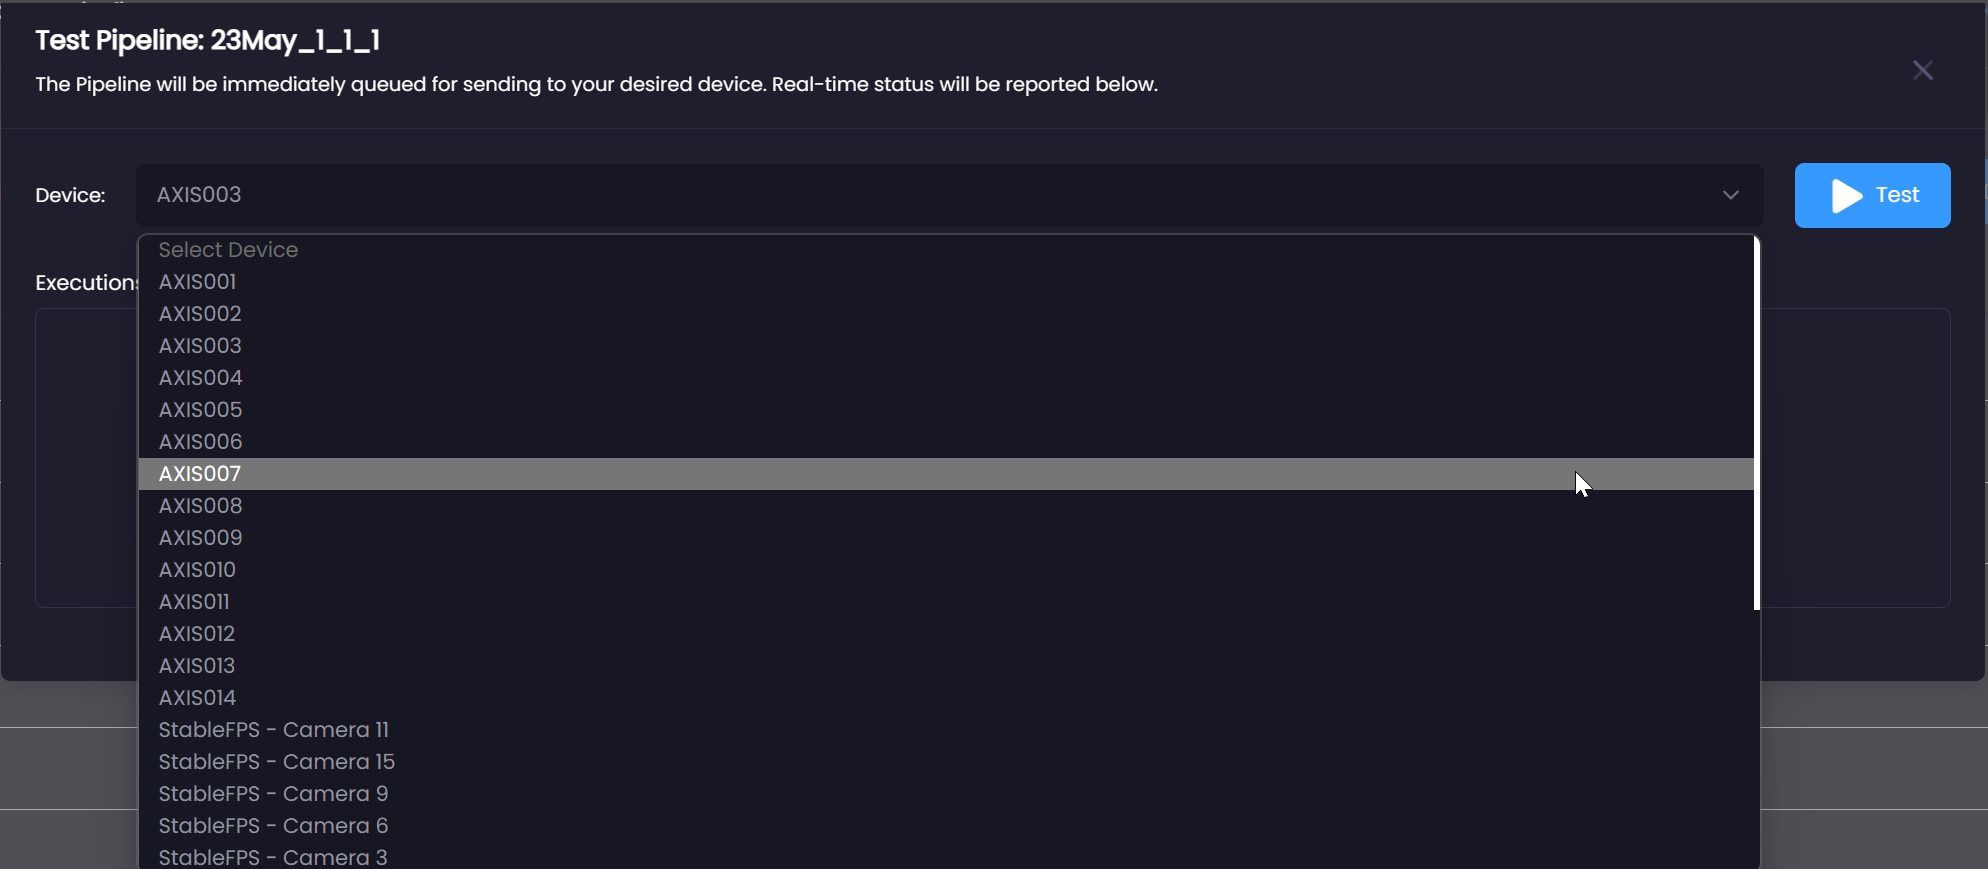
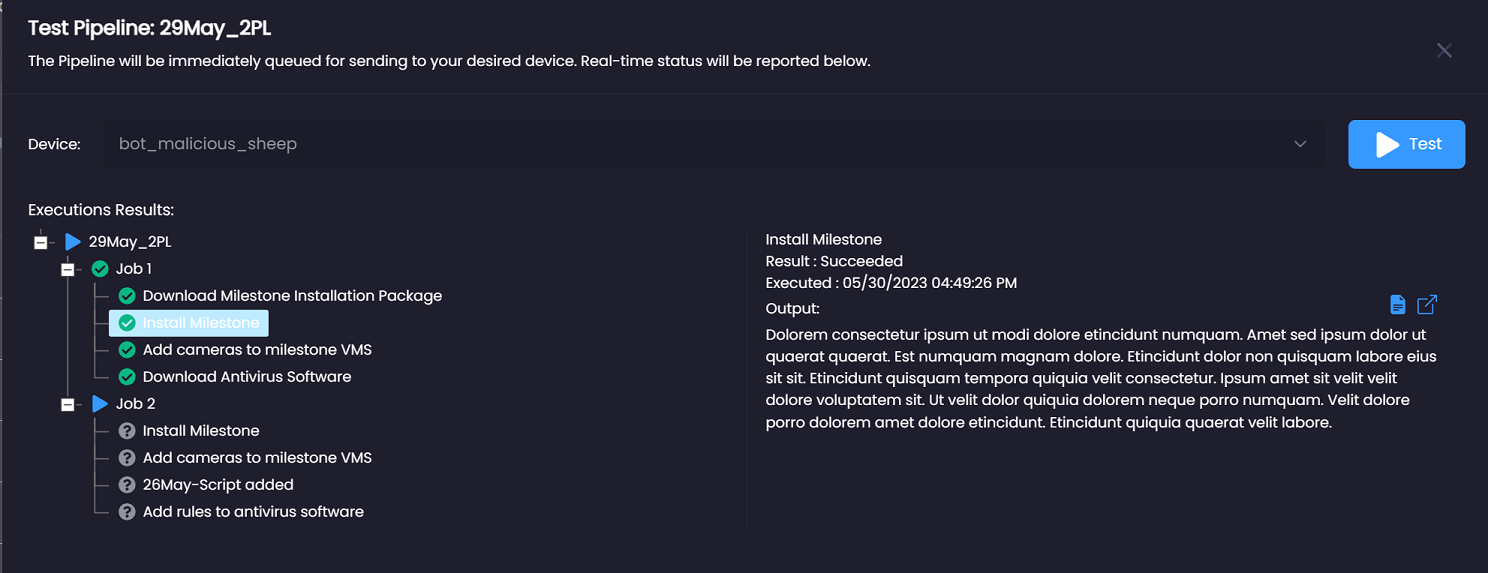
Choose your desired device and click on the "Test" button, this will queue the pipeline for broadcast to the agent. Once the agent has received the pipeline, you will see the execution results similar to below:
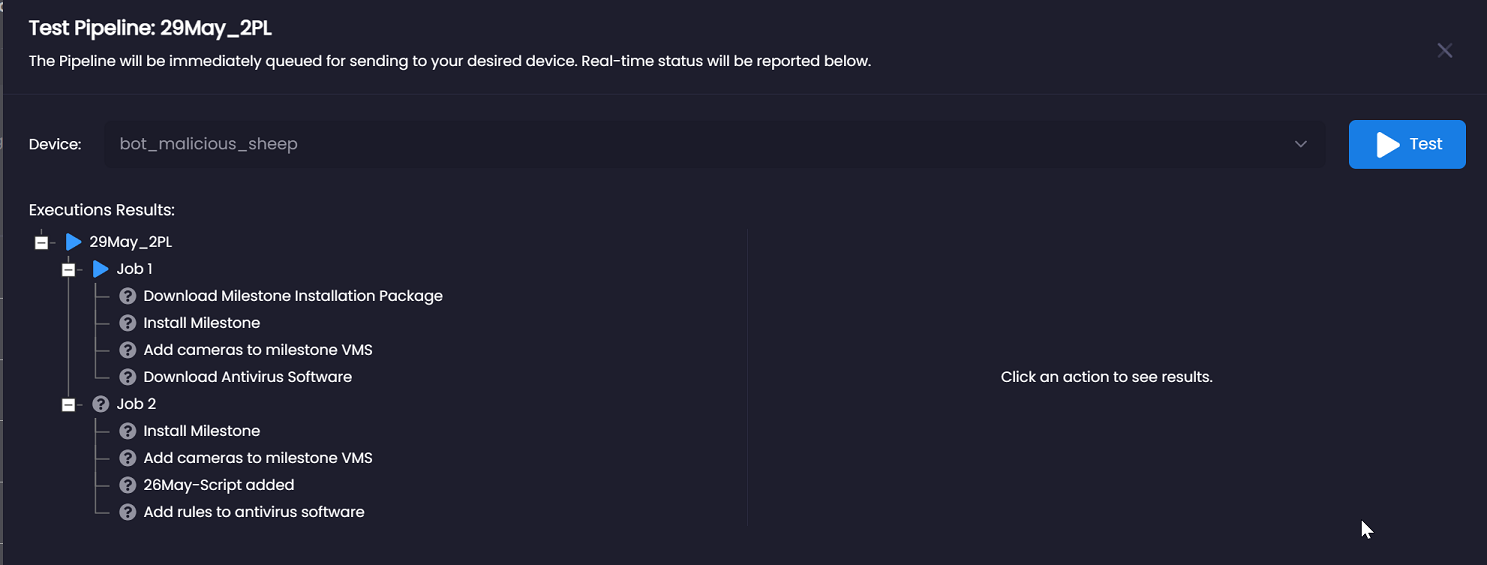
The modal will automatically refresh as the pipeline is executed on the device. You can see detail for the particular task by simply clicking on the item in the tree: